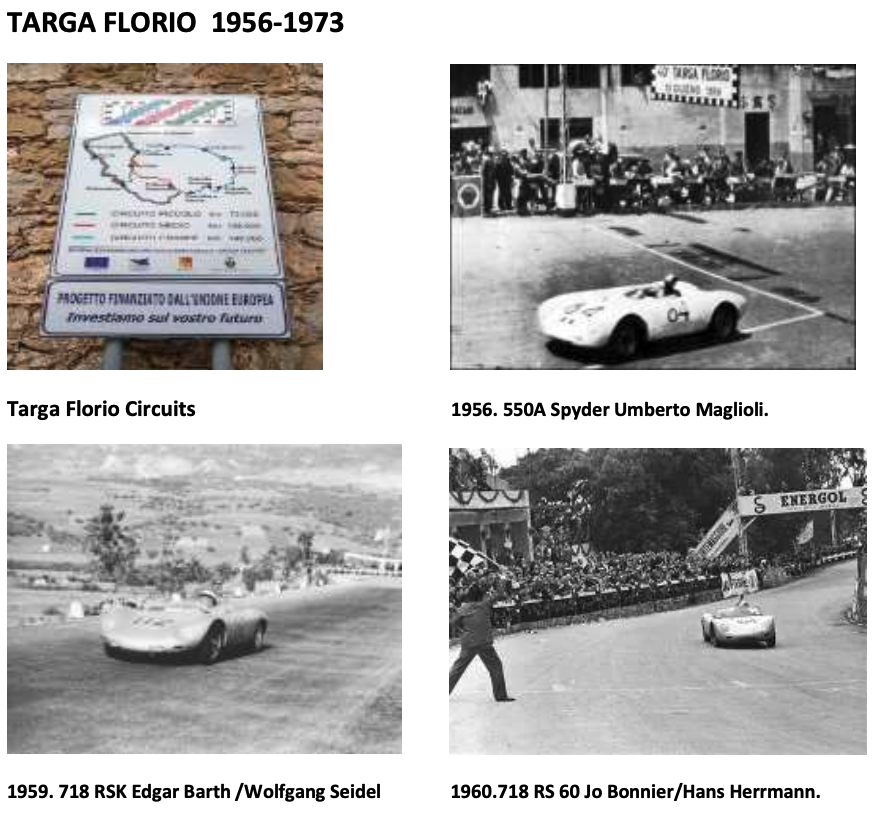
THE TARGA FLORIO… was created in 1906 by the wealthy race driver Vincenzo Florio to
become one of the toughest road race circuits in Europe. The first race covered 3 laps of a 92-
mile circuit (148 km) totaling 276 miles through winding roads with multiple hairpins, over
treacherous mountain passes, totaling 2,000 corners per lap with over 3,500 feet of elevation
changes.
The start and finish of this grueling counterclockwise 72 km (45 miles) per lap race took place at
Cerda on the isle of Sicily. Several course variants of the race circuits were utilized from 1906
until 1973, when the Targa Florio –the oldest European road race --was discontinued as part of
the World Sportscar Championship.
Fiat, Lancia, Bugatti, Mercedes, Alfa Romeo, and Maserati dominated the early race years with
podium finishes.
In the early 1950s, the FIA World Sportscar Championship was introduced; and the Targa Florio
event at the Piccolo Circuit delle Madonie became part of that series beginning in 1955, with
Lancia, Mercedes-Benz, Ferrari, Maserati, OSCA, and Alfa-Romeo being the dominant marques.
The powerful Mercedes-Benz 300 SLRs piloted by the legendary Juan Manuel Fangio/Karl Kling
and Stirling Moss/Peter Collins…finished first and second. Eugenio Castellotti /Robert Manzon
finished third in a Ferrari 857 Sport.
Porsche victories at the Targa Florio: :
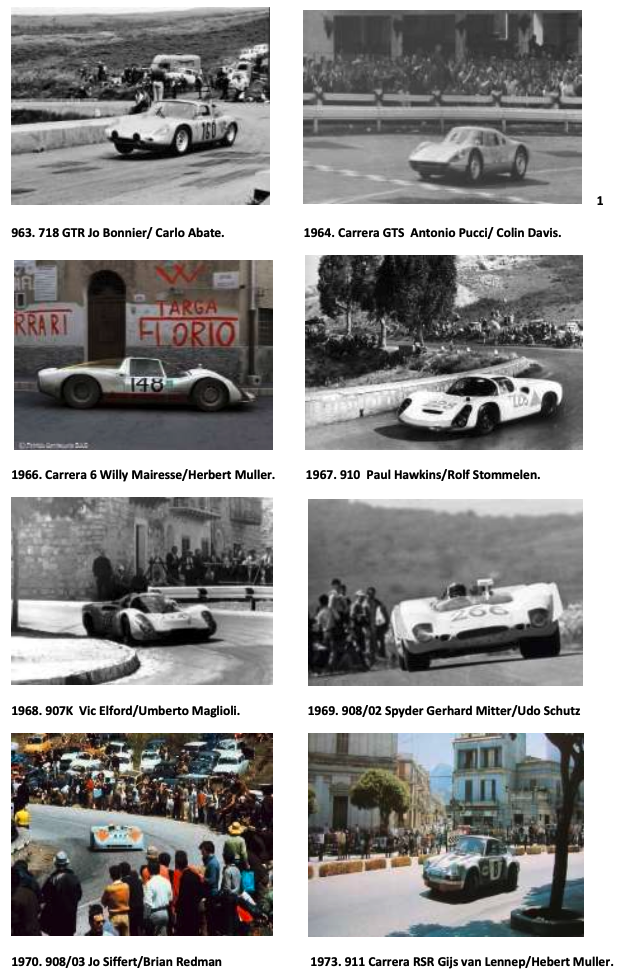
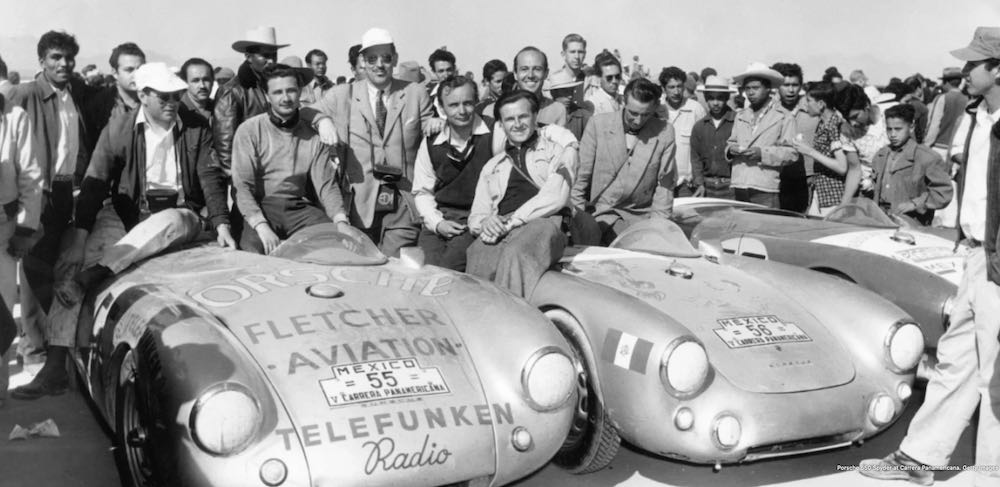
1956. Porsche won its first overall victory with the TYP 550A Spyder driven by Umberto Maglioli.
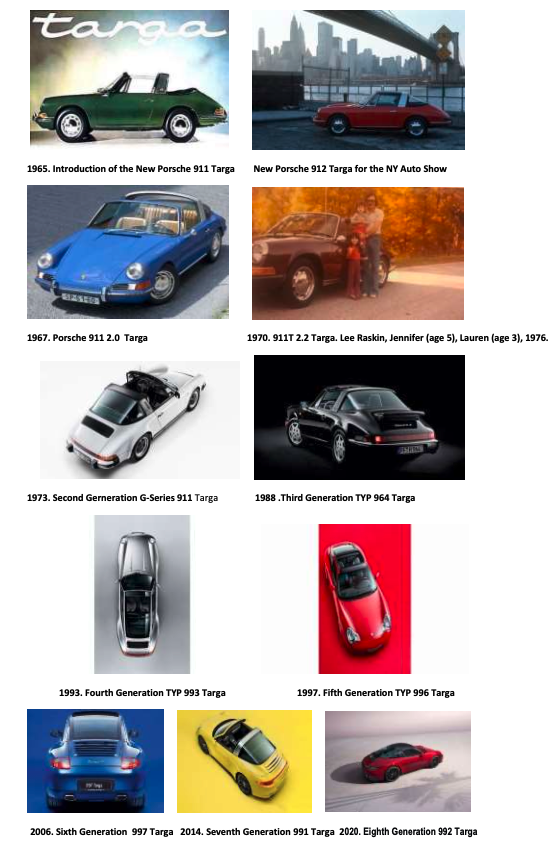
1959. Porsche won its first World Sport Championship at the Targa Florio with the TYP 718 RSK of Edgar Barth /Wolfgang
Seidel. Porsche also finished 2nd and 3rd
.
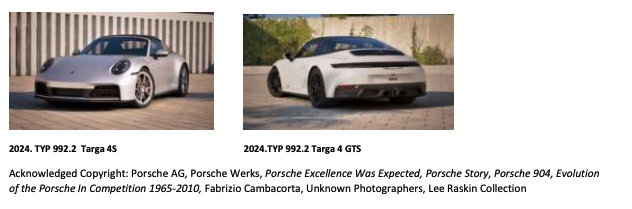
1960. Porsche won with the TYP 718 RS 60 of Jo Bonnier/Hans Herrmann.
1963. Porsche won with the TYP 718 GTR of Jo Bonnier/ Carlo Maria Abate.
1964. Porsche won with the TYP 904 Carrera GTS of Antonio Pucci/ Colin Davis.
1966. Porsche won with the TYP 906 Carrera 6 of Willy Mairesse/Herbert Muller.
1967. Porsche won with the TYP 910 of Paul Hawkins/Rolf Stommelen. Porsche also finished 2nd and 3rd
1968. Porsche won with the TYP 907K of Vic Elford/Umberto Maglioli.
1969. Porsche won with the TYP 908/02 Spyder of Gerhard Mitter/Udo Schutz. Porsche also finished 2nd and 3rd
1970. Porsche won with the TYP 908/03 of Jo Siffert/Brian Redman in the John Wyer-entered Porsche.
1973. Porsche won the World Endurance Championship at the Targa Florio with the TYP 911 Carrera RSR of Gijs van
Lennep/Hebert Muller.Porsche was the most successful marque at the Targa Florio Road Races with eleven first overall
victories between 1956 and 1973.
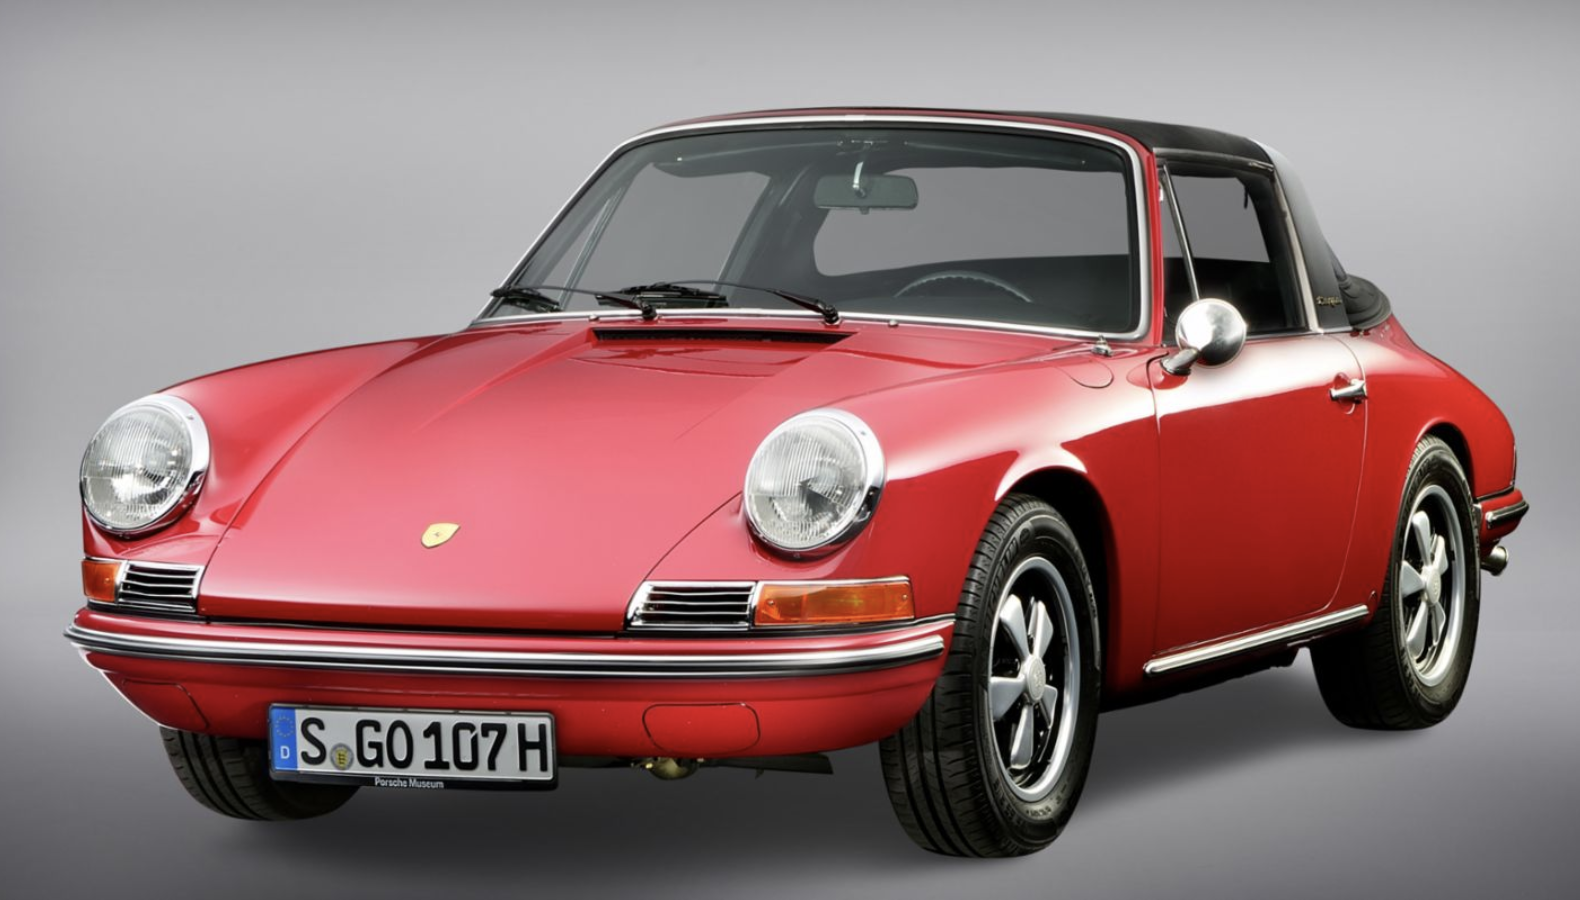
THE PORSCHE TARGA …was conceived by Porsche as a new ‘open top’ cabriolet -type model
with an integrated polished roll bar…and distinctively named, “Targa” in commemoration of
Porsche’s dominant victories at the grueling Sicilian endurance race.
The name Targa translates to “shield” in Italian. The meaning was virtually unknown until
copywriters looked it up.
Billed at first as a “safety cabriolet,” the Targa met potential U.S. safety regulations for
convertibles, featuring the integrated stainless-steel roll bar, a removable folding roof panel,
with a foldable rear window that was included in the standard model. Later, Porsche’s newest
model was described in a press release: “The Targa is neither a cabriolet not a coupe, not a
hardtop mor a sedan, but rather something completely new.”
1965. The new 911 Targa model debuted at the September Frankfurt International Motor Show—as a uniquely balanced open-
air cabriolet with coupe-like strength, style, and security. Production started in 1966 for the 1967 U.S. model year with a 911
2.0 litre engine, as well as with the less expensive 912 four-cylinder model.
1967. Many Targa buyers began to purchase the optional fixed, heated glass window instead of the original folding plastic
version—a refinement that later became permanent on every 911 Targa model thereafter.
1974. The G-Series 911 underwent some body changes with a new box-shaped bumper to meet more stringent U.S. impact
standards. The Targa top remained unchanged, however the trademark brushed stainless-steel roll bar became optional in
black, giving the body a modern character.
1988. The third generation 911, the TYP 964 Targa was introduced, and its popularity continued with over 85,000 units
produced and sold. Beginning life as a Carrera 4, the 911 gained all-wheel drive for the first time, as well as ABS, new power
steering, and an optional automatic gearbox. Also new was a now-iconic extendable rear spoiler –to provide downforce and
enhanced engine cooling.
1994. Porsche introduced the fourth generation 911, the TYP 993 Targa --breaking tradition with the introduction of an
electronically operated glass roof that was tinted, heat-insulated, and extended from the windscreen to the rear. Noticeably,
the TYP 993 also had a new aerodynamic body shape with wider front wings and a broader rear end.
1997. Porsche introduced the fifth generation 911, the TYP 996, marking a new turning point for the model. The 996 would be
completely redesigned and powered by a six -cylinder water cooled boxer engine. However, the TYP 996 did not include the
Targa model in the Porsche lineup.
2006. After nearly a decade, the sixth generation of the 911 the TYP 997 was introduced, and the Targa evolved once more. A
new lightweight Targa glass reduced the weight by many pounds while two highly polished aluminum strips traced the roofline,
distinguishing the Targa within the 911 range. Porsche also offered the Targa in an all-wheel drive as the 911 Targa 4 and 911
Targa 4S.
2011. Porsche created the seventh generation of the 911. However, the Targa was not produced until 2014. The Targa was re-
established with its original signature stainless-steel fixed roll bar, with modern roof mechanics and structural rigidity. Once
again, the unmistakable Targa silhouette – wide bar, wrap-around rear window and open- top section above the front seats,
was paired with a fully automatic roof system.2020. The Targa variant joined the eight generation TYP 992 in the Spring, just is time for top-down driving in the Northern
hemisphere. The new Targa featured its distinctive wide roll bar and moveable roof section. The fully automatic mechanism
allowed the roof to open and close in a mere 20 seconds, offering the open-top freedom with coupe comfort.
2024. Porsche launched the TYP 992.2 version of the 911 –which included all-wheel drive versions of the Targa—available in 4S
and 4 GTS form
Looking back, the legendary Porsche model derived from the famous Sicilian Road Race has
certainly endured…as we commemorate 60 years of this iconic Targa - along with its
unmistakable and competitive signature.
*Lee Raskin is an internationally recognized Porsche 356/550 historian and author of acclaimed
photographic biographies.
Copyright Lee Raskin 2026.