Technical Articles

Using the Stoddard or Factory Suspension Pan Jig

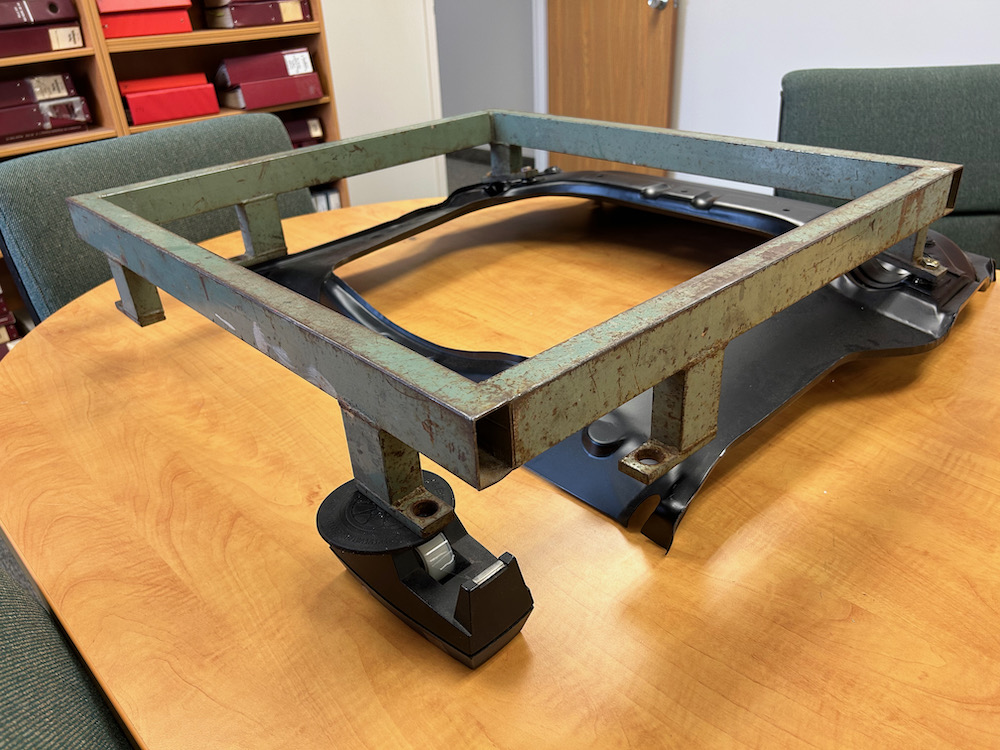
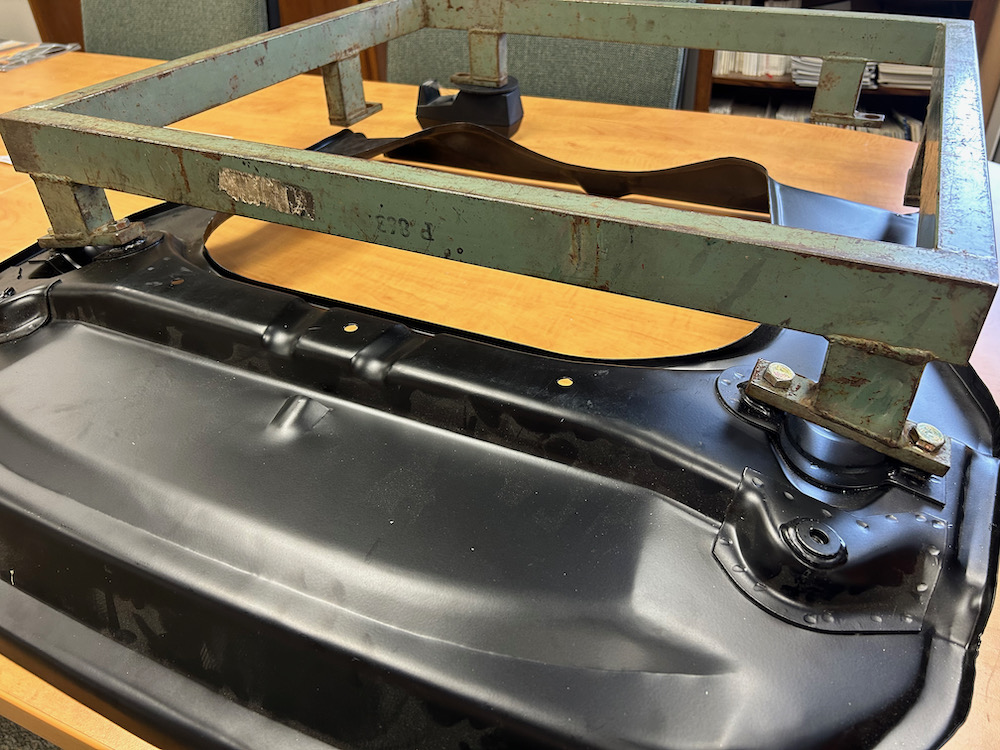
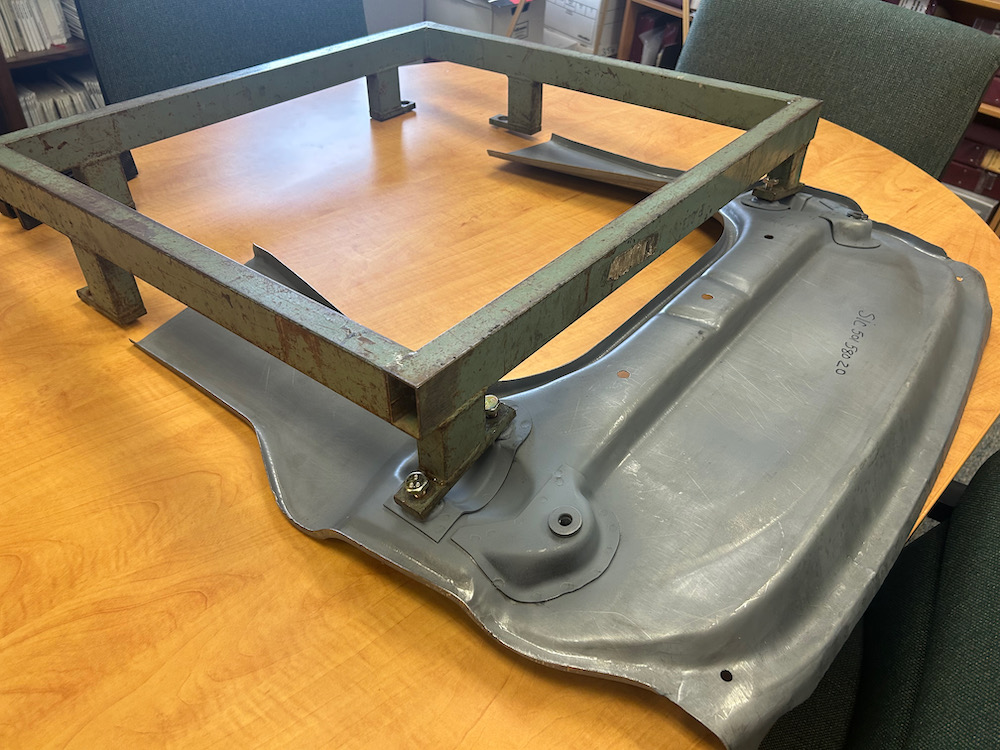
Here are a few tips to properly using the Factory or our P863 suspension pan jig for the 911 or 912 to replace the lower front suspension pan.   

Before you do anything on the car, you must first mount the pan to the jig.   This is best done on a large, flat surface with the pan flipped upside down.   

Next, prop the "back" of the jig up so that when the front is sitting on the pan, the jig's back pads are parallel with the working surface.  

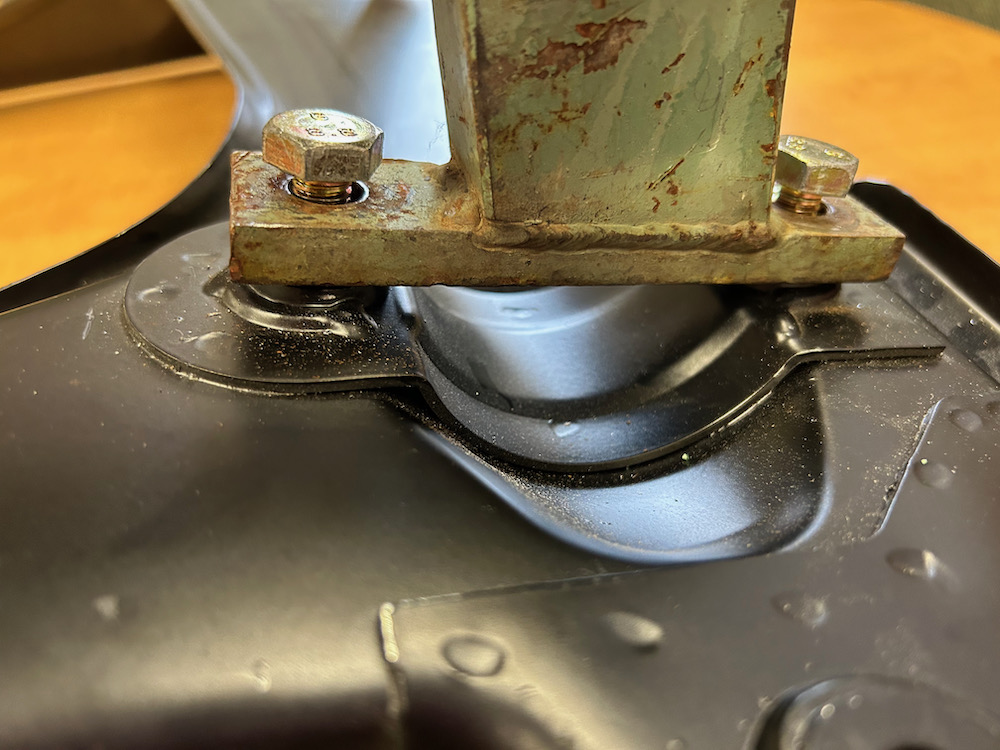
Next,  thread the four torsion bar mounting bolts in just a little bit.  Do not thread one in and expect that the rest will all just line up--they will not.  You can put a little bit of weight with your hands on the center of the "U" of the pan to flatten it slightly-this can help you thread the bolts in that first bit without cross threading.  

As you tighten the bolts in an alternating sequence, the suspension pan will conform to the "shape" of the jig and its pads.  The pan is flexible—the jig is not.  

Once the pan is mounted securely to the jig, you can flip the assembly over and bolt the four rear pads to the existing holes in the car's chassis for the steering rack cross tube.  Once you are certain that everything is lined up torqued down, you can start the welding process!   

Buy Suspension Pan Stuff Here. 


Ask Brad Q&A: Porsche 356 Fuel Sending Units — February 3rd, 2023

Question:

I have a 356B, 1962; it's a T-6 body. It had a gas tank with the bottom-mount sender. I bought a new tank which has the sender on the top. Along with the tank I had to purchase a new sender. I fit the sender in the tank but now the fuel level in the dash instrument goes to the end - it doesn't work. What do I do now?  - S. Turner, Cypress Beach, CA. 

Answer:

It sounds like there is a ground problem. Take a look at the wiring diagram below. You’ll see the sender is grounded on one side; the ground is actually made through the sender screws. You may have had your tank powder coated and the screws may not be making a good ground.


The new top mount sender is an entirely different design than the old bottom mount sender. As you see above, the new sender is the float-arm type. If you were to measure the new sender, the resistance reading is 200 ohms in full position and 6 ohms in the empty position. The older bottom mount sender was 107 to 2 ohms and the dash instrument had a red “R” hash mark for tank reserve indication. Ideally, you will want to have your instrument recalibrated, however your present instrument will still give reasonable fuel level readings.  

As for wire connections, you can connect the same wires as were used on the old bottom mount tank.  Remember, the brown wire is always “ground."  

General notes: In the wiring diagram for your car, you can count thirty-five places where components are grounded. Some components need to touch a good clean mounting surface. In the front trunk, on each side, only a sheet metal screw is supposed to make contact for blinker lights and horns; be sure there is good contact there.

Specific note: 356B T-6 vehicles using the bottom mount sender also have unique markings on the fuel level gauge. 

Regards,
Brad Ripley

Ask Brad Q&A: 356 Clutch Cable — May 22nd, 2020

Question:

 
I have a 356A coupe and getting it ready for driving this Spring. I have the brake and clutch pedals out of the car and thought to replace the clutch cable. But, I’m confused as to which cable to order – the online listings like the Porsche PET aren’t too clear. - A. Cunningham, Monroeville, PA.

Answer:

Yes, there continues to be confusion about the cables due to misleading printed catalogs and present on-line entries. Many guys seem to go by the length of the cable when ordering. All old used cables in the car for 20-40 years have stretched, so length isn’t a good identifier but can be a rough guide. By the way, the difference in lengths of new cables is only about 3 inches. So, a better guide is the thread diameters on both ends of the cable.  If you disregard the very early cable with the outer casing, you’ll see other three cables all have a different combination of end threads. So the thread diameter is the key to which cable you need. 


Take a look at the chart below.
Askbradchart

In the chart I added the part number of the  German company, Gemo, that supplies these cables to the after-market.  In the last several years, Gemo has identified their cables with a red sleeve marked with their part number – a convenient way to lessen the confusion with these cables. 

See our website for details for cable end fittings for each model/transmission combination. Also, I recommend application of the Wurth product, HHS-K lubricant, on the moving parts at each cable end. 

Regards,
Brad Ripley
   

Ask Brad Q&A: Fuel System Banjo Bolts — April 27th, 2020

Question: 
I’m finishing up the rebuild on my 356B Super engine. It’s been a couple of years and just now I’m installing the fuel system. I have several banjo-bolts and can’t figure out which one goes where.  Please enlighten me on banjo bolts. - P. Garvey, Concord, MA.

Answer:
Like many guys owning and working on 356s, you probably have a box of nuts, bolts and other fittings including a few banjo bolts. There were many banjos on Porsche engines, so it’s not surprising you have this question. If you are wondering, What’s a banjo bolt? See this video here. Porsche calls these "hollow bolts."
carbemail1  carbemail2 2 carbemail3.1

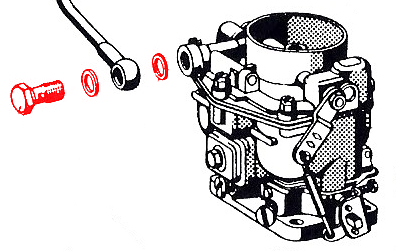
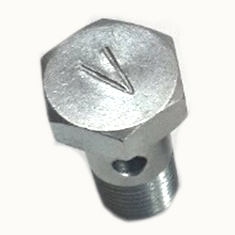
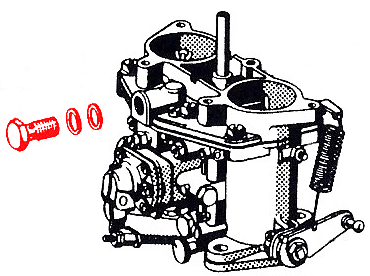
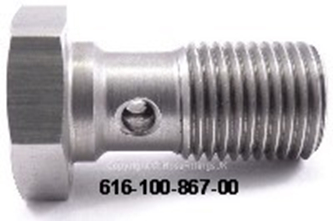
For 356 fuel systems there are only two bolts to worry about. First, for the carburetors (Zenith and Solex), the bolt looks like this photo:
banjo1  banjo2

The important dimension is the thread: 12 x 1,25. The length of the bolt is 22,45 and shoulder under the head is 12,00. With many original bolts, the head will be stamped with a “V” which denotes Vergaser, German for carburetor. Part number is 616 100 867 00 .

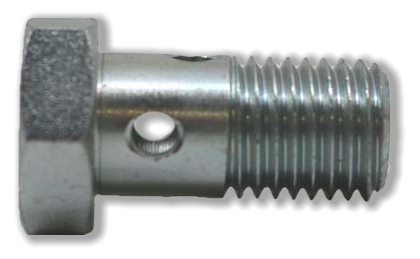
For fuel pumps, the bolt may look about the same but the thread is 12 x 1,50. Length is 24,00 and shoulder is 12,00. Part number is 900 175 020 01. Bolt looks like this below: 
banjo3.1

Note, there is no shoulder under the head, although the same sealing washer is used.
The fiber sealing washer for both sides of the banjo (ID 12,12) for both carbs and pump is part number 616 108 423 00. You’ll need seven washers per engine. 

Incidentally, for early 356A engines, the 900 175 020 01 bolt is used in the Solex 32 & 40 carbs and also in the early fuel pump. 

I hope this sorts out some of those banjo bolts in your Treasure Box of Fittings.

Regards,
Brad Ripley

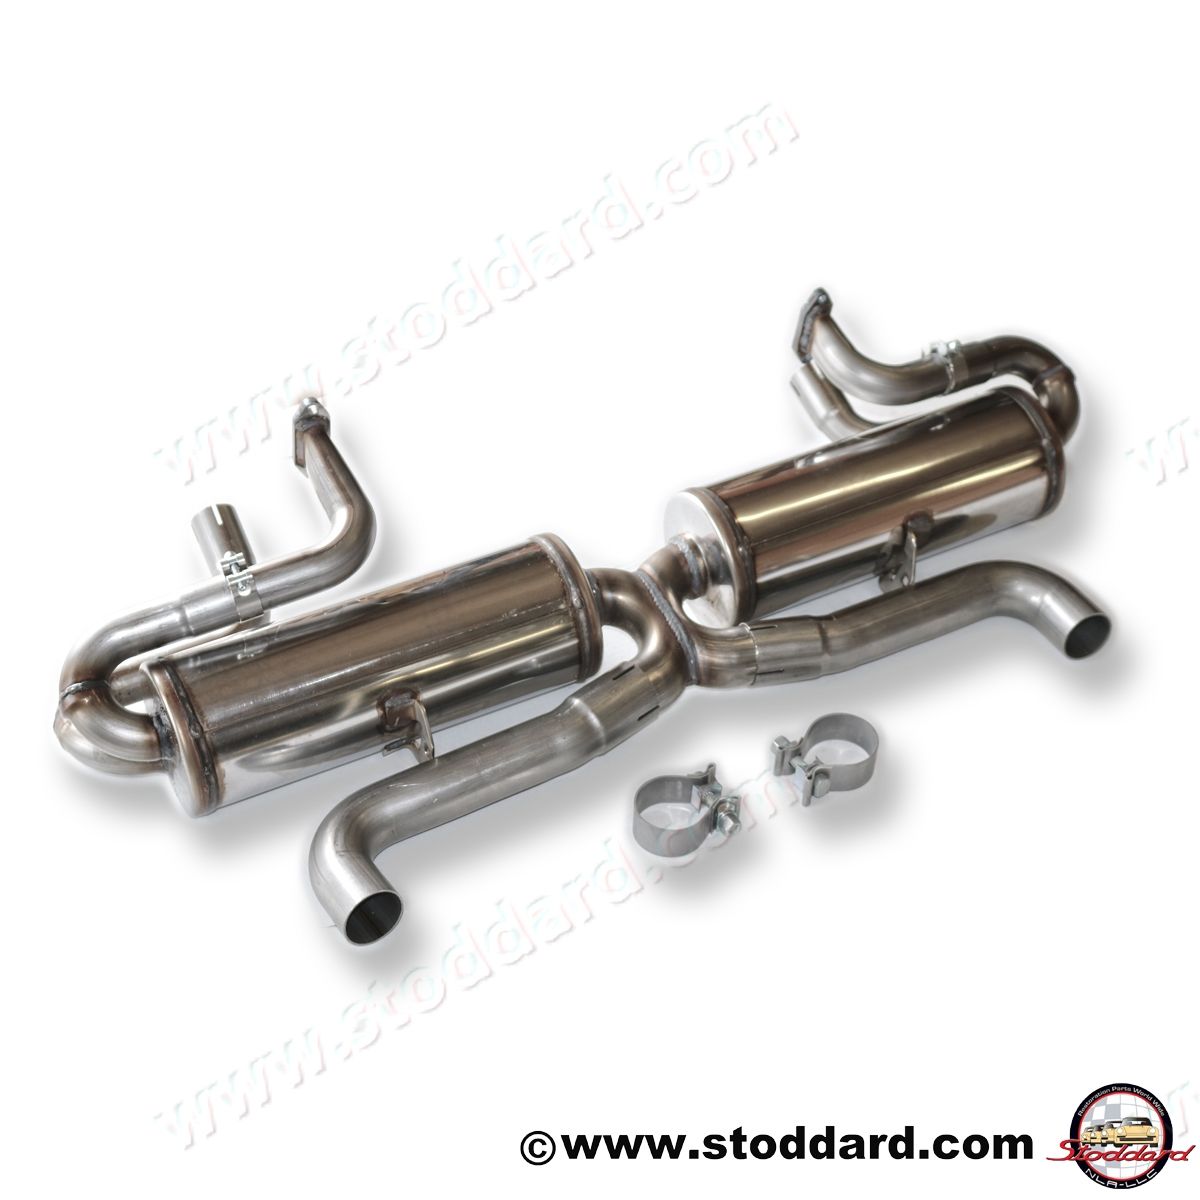
Stoddard Stainless Sport Exhaust System for 356 and 912.

Please Meet The Stoddard Stainless Sport Exhaust System for 356 and 912!

A few years ago, we helped the TV Show, "Overhaulin'" build a custom 356 by supplying them with sheetmetal and trim items to complete the project. The Host, Chip Foose, did a lot of custom work on the 356 and our friend Rod Emory chipped in as well. The finished car included a pretty wild exhaust system that we loved.  

The exhaust system was engineered at Magnaflow for the TV Show—we then took that original design and adapted it for larger scale production to fit 356A through 356C cars with the included mandrel-bent tubes that slide into the stock bumper outlets.  We also created tips so that the all-stainless-steel performance exhaust could be used on a 912, as well as Sport tips for exiting under the bumper on a 356.  It's got a great, throaty sound and works well on stock and 1720cc big bore engines.  

The exhaust systems are constructed out of 400-series stainless steel with polished straight-through perforated-core mufflers. The design incorporates an X or Cross pipe design to boost torque, which is usually difficult from a packaging perspective on a flat-four engine.  
    

We took extra care to perfect the exhaust note of the system. There is no resonances or drone at speed—just a nice, throaty sound during acceleration.  Here's a link of the video of the sound during acceleration HERE.  You can also hear the exhast system idling HERE. 

Please give us a call at (800) 342-1414 to order or go HERE to order online. 


Ask Brad: Q&A -- Drum Brake Tips — 4/11/2019

Question:

I have a 1963 356B coupe which needs new front brakes.I’m pretty handy working on cars and want to do the work myself. I see you sell new brake shoes and all the other brake stuff. Tell me what to watch out for with this job. - George B.,  Cleveland, OH.


Answer:

There are no real mysteries in the Porsche 356 drum brakes. So here’s a few words that should help you out. Obviously, the front drums need the most attention and the drums themselves wear out after all these years.  Any cracks in the drum linings are cause to have the drums relined – there are a couple of sources for that service in the US – call me for names. Plus, the Porsche factory has recently manufactured new complete drums. However, usually the drums are good and may only need slight re-surfacing.

 
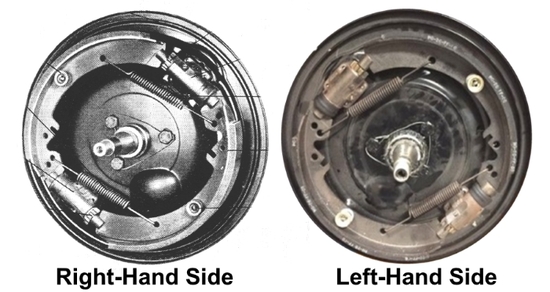
Assuming your drums are good, then your major job will be replacing the shoes and wheel cylinders. There are three areas to pay attention to. See photos below of both brake assemblies. 

Brake cylinders – two of the cylinders you will receive will go in the upper location and two go in the lower location. Look in the photo of the right-hand assy: The upper cylinder has the adjuster on the left side and the bottom one has the adjustor on the right side. 
 
Brake shoes – all four shoes should be the same design. The new production shoes from Stoddard NLA are modelled after the last and best original version. Previous Porsche versions can be used as well but are not as effective. Check the position of each in the photos.  

Look at the shoe in the upper left in the right-hand assy.The thick end goes into the adjuster side of the cylinder and the thin end goes into the non-adjustor side of the lower cylinder.
 
Some shoes are slightly thicker and/or bent on the end and will bind in the slot. A little filing or slight grinding will take care of that problem. A very slight touch of anti-seize compound at those points will solve any binding.   
 
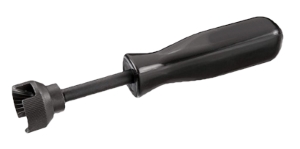
Springs – carefully note which hole the ends of the springs attach to. Those springs are four of the big springs in your brake hardware kit (the other two are used on the rear brakes). You’ll find that vice-grip type pliers are your best friend to get the ends of these springs into the holes! The other springs are the little coil springs which tension the end caps against the “nails”. Again, there’s no problem if you have the right tool.  Buy one like this at Pep Boys which will take the grief out of setting the seats against the springs.

That should get you started on doing your brake job. Give us a call with any questions.

800-438-8119.  

Regards,
Brad Ripley
Ask Brad: Q&A -- Fan Shroud Plugs — 3/28/2019

Question: 

I have a 356C. This Spring I’m detailing my engine – painting the engine tin and coil and so forth. I bought two tiny rubber plugs but wonder where they go. The part number on my invoice is 539-06-116. 
John C.,  Sacramento, CA.

Answer:
Good question. The Porsche Parts Catalog and the Porsche Electronic Catalog (PET) just shows those little plugs off to the side of the fan house and no real indication of where they go. Take a look at the photo below.  In the background is the fact that the fan housings started out from Volkswagen and were modified by Porsche as the years went by. You can see some metal plugs spot-welded here and there which close up 
holes used in other applications, i.e., Pre-A and industrial engines.


You will need two of these plugs. Note, one of the plugs will be hidden after the coil and oil filter brackets are installed. 

Give us a call with questions any time.
 
800-438-8119.  

Regards,
Brad Ripley
New Stoddard Brake Shoes

by Cameron Taylor

Demand the best for your vintage Porsche brakes– Stoddard’s new production of quality 356 drum brake shoes. When the 356 was produced, it was equipped with drum brakes, which were pretty normal for the time. These function by expanding the pair of shoes into the inner friction surface of the drum to create friction to stop the car. In 1964,  with the introduction of the 356C, Porsche switched to the newer and more modern disc brake system. However, there are many older models still on the road, and as they are performance cars, albeit vintage,  braking is still of top importance. 

For many years remanufactured brake shoes were the only choice for the 356 owner. Just as it sounds, each shoe is stripped of its friction material and new material is reapplied. Now there is an option for higher quality and better performance. For the first time in decades, newly manufactured 356 brake shoes are available for sale. These new shoes are designed to fit perfectly and are a great value.

Stoddard brake shoes are made here in America using the highest quality components. Each new backing plate is laser cut and then assembled using state of the art computer-controlled TIG welding. The backing plate ends are finished with proper coining to better fit the cylinders. The friction material is bonded to our plates with asbestos free lining applied by the largest manufacture of brake shoes here in the United States.

An axle set of our brake shoes (4)  is a great value and will fit 356, 356A, and 356B models. There is no core charge as we use all new material.

Click Here to Buy. 


 brakeshoe1

Our backing plate components are made from high quality steel

Our shoes are made using state of the art TIG welding for optimum fit and precision.

Obenauf's Leather Oil

Stoddard is proud to announce that we are now a stocking distributor for Obenauf's Leather Oil.  It's a great product that helps older leather look its best.  Made in the USA from a special formulation of beeswax and natural oils, it freshens older leather and keeps it from cracking further.  It's easy to apply. We treated the leather in all of our cars and have been very pleased with the results.  It even works on other leather products, like shoes and belts. 

You can purchase it HERE in our online store.  

We sell the Obenauf's Leather Oil in a convenient 8-ounce bottle. This will be enough oil to treat your seats several times.  

This is a typical side bolster seen on a well-cared for 993.  After 20+ years, the leather has dried and started cracking. 

The top cap of the bottle includes a dauber to apply the oil.  

After you've applied some oil with the dauber, you might also try rubbing the oil into the leather with your hands.  It's easier to work into the seams and corners that way.  We'd probably recommend latex or nitrile gloves for this step.  

Side bolsters typically need the most attention. 

Use your fingers to massage the oil into the seams and cracks of the leather. 

After you've applied the Obenauf's Leather Oil, let it sit over night.  Reapply to any areas that are cracked and let it absorb again.  Finally, you can buff it to a nice, matte shine.  

Once the leather is buffed, you can see how the finish is very uniform, soft and "healthier" than when you started. It does not fill in any cracks or bring back areas where the dye has worn away, it just helps keep the leather soft and supple so further damage is minimized. 

You can purchase it HERE in our online store.  

© 2024 Stoddard NLA LLC. All Rights Reserved.