Question:
I finally got my door handle pieces back from the chrome platers. It's been a long time and now I can't remember how to put the handles back together. Please give me some tips for proper re-assembly. - L. Davis, Marina, CA.
Answer:
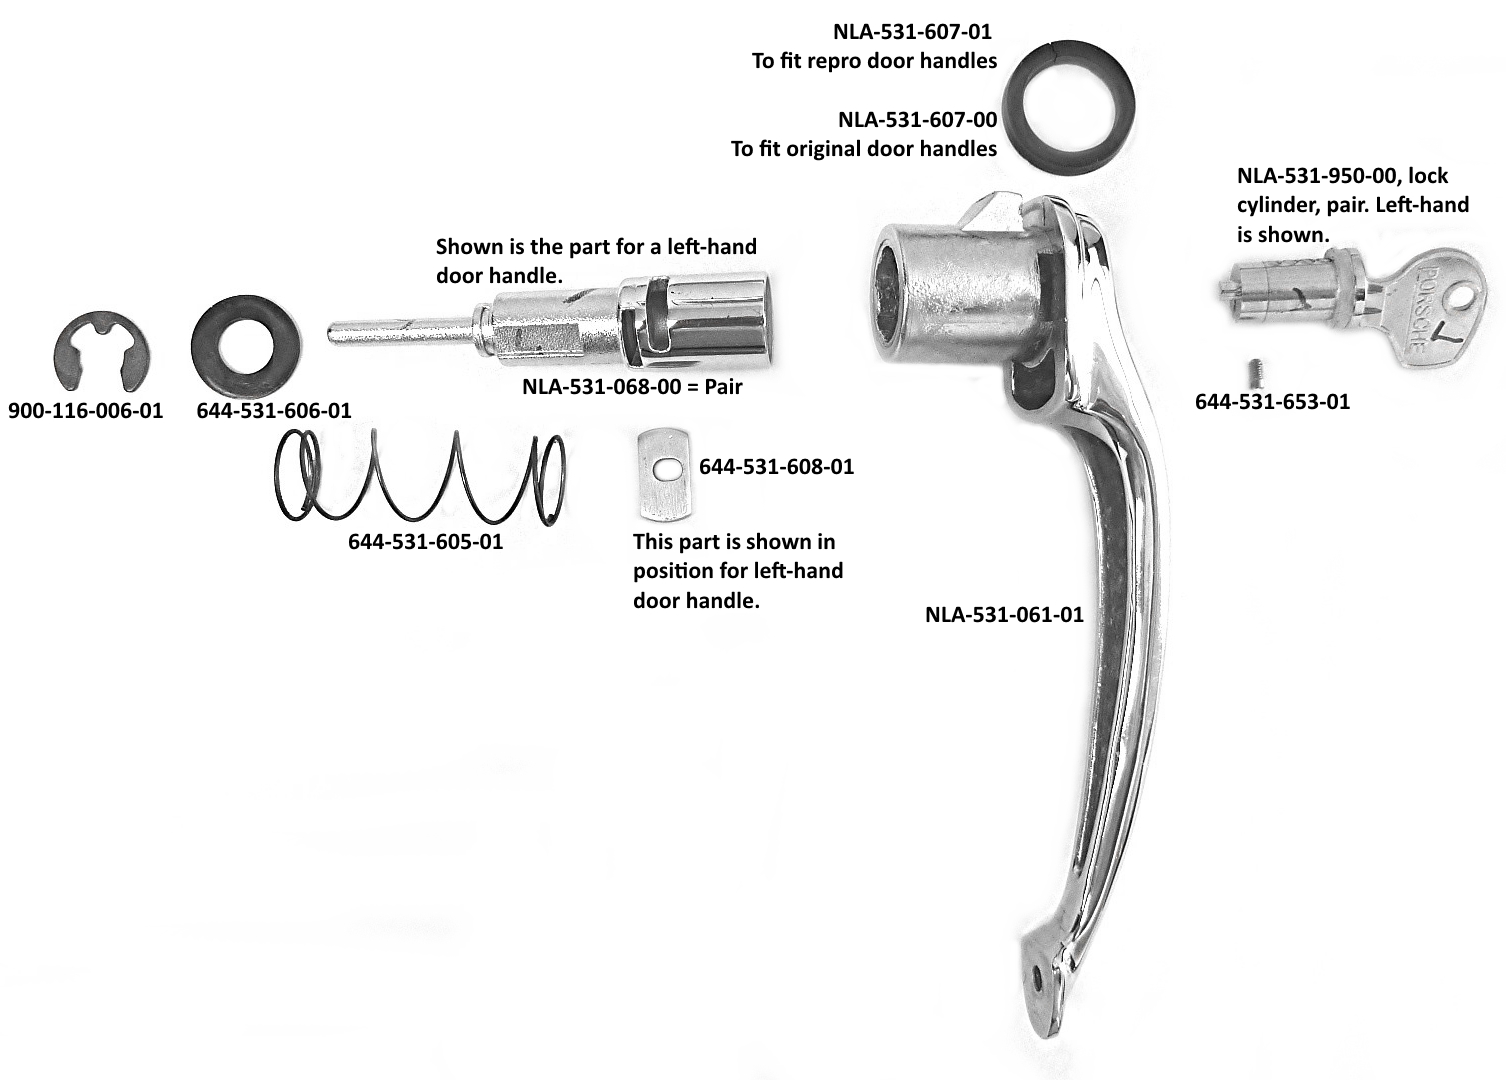
Here’s a quick primer on these door handles – Below is a photo layout of the parts to make a left-hand B/C door handle.
Having put together many of these assemblies myself, it ain't easy the first and probably the second time! Here's four truths to go by:
The door handle casting is neither a left nor a right; however, your original castings will be marked L or R on the end. You can use the casting on either side of the car; the markings are hidden.
Original and reproduction door handles may look the same but different type seals are required (because of the way the groove was machined). Proper seal (and some grease) will keep the cylinder receiver casting from rattling.
The locking slider can be installed four ways; only two ways are correct.
The handle is locked if the key is vertical with teeth towards the ground.
The handle is unlocked if the key is horizontal with teeth towards the rear of car.
Here’s a photo of the lock assembles shown in the unlocked position.
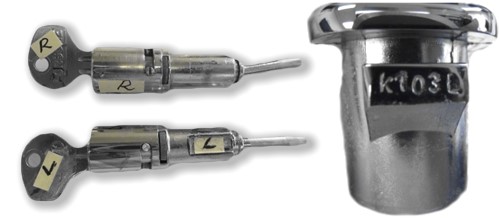
Look at the left-hand one: (1) the teeth of the key are facing up; (2) the indented portion is visible; (3) the grub screw is in the upper end of the slot; (4) the lock slider is flush with the receiver casting on both sides. It’s best to get a left one put together correctly – then the right-hand one is just the opposite!
I use a fair amount of white lithium grease for assembly. You may have to slightly grind the casting so the receiver piece can be pushed in and out cleanly.
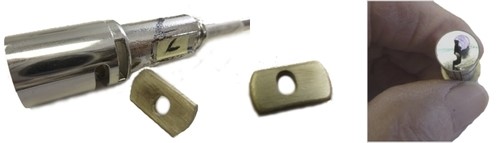
The brass lock slider is the most frustrating to get right. As mentioned above, it only goes one of two ways. Here’s a photo of the slider orientated to go into the left assembly. You can see the narrow side of the hole to the upper side and the longer end facing out. You can also note that the stud on the end of the lock cylinder is offset also.
I use a fair amount of white lithium grease for assembly. You may have to slightly grind the casting so the receiver piece can be pushed in and out cleanly.
The brass lock slider is the most frustrating to get right. As mentioned above, it only goes one of two ways. Here’s a photo of the slider orientated to go into the left assembly. You can see the narrow side of the hole to the upper side and the longer end facing out. You can also note that the stud on the end of the lock cylinder is offset also.
You’ll find the sliders will stay in place with a little extra grease. Good luck with the project!